My Stampin' Up! Classes

Showing posts with label techniques. Show all posts

Sunday, August 4, 2013

Sponged one-layer card uses Serene Silhouettes

 
Sponging was one of the first techniques I learned when I started stamping. It can make a dramatic impact on your finished creation with little effort.

 
First, I used my Stampin' Trimmer to cut a rectangle in a scrap piece of paper. That scrap was then placed over my card front so I had a guide to follow while sponging three different colors of ink - Pool Party, Crushed Curry and Pumpkin Pie. Then I stamped an image from Serene Silhouettes (page 54) in Jet Black StazOn over the top of the sponged area. I removed my template (in the foreground), then stamped a sentiment from Petite Pairs (page 73).

 
This clean and simple card is also called a one-layer card. Hope you like it!
 
Don't forget - you may win hostess benefits (starting at $25) when you place an order through my Online Store at http://TheRubberRoom.stampinup.net by August 31 using the hostess code below. And everybody who orders Tag It from me by August 31 will also have their name entered into a drawing for the Pretty Print Textured Impressions Embossing Folder in the Holiday Catalog. I'll announce the winner on Sept. 1 AND if you use the following hostess code, you'll also be eligible to win hostess benefits starting at $25. Here's the code - GGQ2GJ3A.
Pretty Print Textured Impressions Embossing Folder
The photo shows a sample of the Pretty Print embossing.

 
This is a wire egg basket I bought at a garage sale. I have a metal hen basket on the washstand in my entryway that holds miscellaneous things like coupons, pens, and anything I want to remember to take with me as I leave the house. I think it adds a touch of whimsy to any decor. Have a wonderful day!


Thursday, June 27, 2013

Floral Frames Collection framelits card with fold at top

 
How sweet is this vintage button with a baker's twine bow?
 
 
One of my club members asked about using framelits to create differently-shaped cards. I went with the Floral Frames Collection.


Here's a look at the side of the card. What's cool is that when you add a framelit-cut flower out of Quattrefancy dsp it doesn't look like a fold on top at all. I layered Pool Party and Melon Mambo flowers along with a different patterns of the Quattrefancy paper and finished it off with a vintage button with white baker's twine. The sentiment is from the Blooming with Kindness stamp set, stamped in Smoky Slate. This card fits in a regular medium-sized envelope.

To order any of the products used above, please visit my Online Store at http://TheRubberRoom.stampinup.net. Thanks!

Friday, October 19, 2012

Toxic Treats label framelit card with Herringbone technique


My club members made this beautiful Halloween card this month. It uses the stamp set Toxic Treats, one of my favorites! I CASE'd it from my blogging friend Elizabeth. It starts with a Pumpkin Pie card base that I embossed with the Vintage Wallpaper folder, then I used strips of Howlstooth & Scaringbone dsp on Very Vanilla card stock to create a herringbone pattern that is fabulous because it shows so many colors and patterns when run through the label framelit. The black label framelit was also embossed, and the button and 1/8" taffeta match the card.

I love this technique because it makes great use of dsp scraps! We all have those. There are still a few days left to enter your Halloween project in The Great Pumpkin Blog Hop. You can find that post below. Have a wonderful day!

Wednesday, September 26, 2012

Wicked Cool easel card for Week 9 of Pumpkin Blog Hop

 
When I saw my blogging friend Debbie Henderson's cute little candy corn a few weeks ago, I had to incorporate them into my own card! This Halloween easel card was one of the projects for my club members this month. I love those googly eyes!
 
 
I adhered strips of Daffodil Delight, Tangerine Tango and Whisper White card stock to some computer paper, then used the Pennant Punch to make the candy corn shapes.
 
The card base is Tangerine Tango with pieces of Howlstooth & Scaringbone dsp, some Basic Black ric rac (Tasteful Trims die for the Big Shot), and dotted scallop ribbon. I love the new little scallop circle punch in the Holiday Mini too. It's such a cute size for little sayings like "have a WICKED halloween."
 
 
Each week, you're invited to add your Halloween creation to the blog hop, along with the code near the bottom of each post. When you add the code to your blog while you are in the edit HTML mode, your readers can play along, leave comments, and view the samples right from YOUR blog!

At the end of 13 weeks, one person will get a $50 Stampin' Up! gift certificate! The more times you enter the blog hop, the better your chances of taking home the Grand Prize. You also get a ticket just for displaying The Great Pumpkin Blog Hop badge on your blog. Whoo hoo!
 
 
Here's a side view of the easel card. You can see the bats inside. There's just enough room for a brief note!

Wow! It's hard to believe we'll be in October and another week closer to Halloween! I figured it was time for my blog header to reflect the change in weather and seasons. What do you think? It's quite a change from the pink floral header I had before. I hope you find a few minutes to add your project to the blog hop. Thanks!

Stamps: Wicked Cool;
Ink: Basic Black pad;
Paper: Whisper White, Basic Gray, Basic Black, Tangerine Tango card stocks, Howlstooth & Scaringbone dsp;
Accessories: Googly eyes, Stampin' Dimensionals, Tasteful Trim die, 1-1/4" scallop circle punch, 1" circle punch, 2-3/8" scallop circle punch, 1/2" Scallop Dots Basic Black ribbon, Pennant Builder Punch.

Sunday, August 19, 2012

Wonderful Winterland penny spinner card


Bear with me as I write several posts today. I have been taking photos and getting things organized in my stamp area in preparation for another busy week. I have many more Christmas cards to post. I'm not all about Halloween, though I do enjoy it!

I love cards with movement! And this penny spinner Wonderful Winterland card is so fun and easy to make. This was one of my club projects this month.

I started with a Baja Breeze card, running the front through the Big Shot in the Perfect Polka Dots embossing folder. Using the Apothecary Accents Framelits, I diecut this oval-like shape from Snow Festival dsp, then used the Word Window punch to punch through both layers 2+ times, making a track on which the spinner will rest.

The spinner is a penny, two dimensionals on top of each other, and a second penny. Then I stuck two dimensionals side by side on the outside of one penny and stuck it to the back middle of my "medallion" - the kid innertubing. I used a combination of markers and ink pads with a blender pen to color the image, outlining the entire thing in Sahara Sand to make the other colors pop.


Order 24/7 from my Online Store: http://TheRubberRoom.stampinup.net;

Get a FREE Halloween Project Kit when you buy the Starter Kit for only $99 plus tax thru August 31, 2012. You can fully customize your kit thru my SU! website.

A So Sorry card for so many occasions


This brayered So Sorry card was a club project from last month. I love brayering as a technique. It covers the surface quickly and easily. I used glossy white card stock for the brayered layer, first brayering the entire piece with Daffodil Delight ink, then going back and adding Pumpkin Pie ink from the top and bottom to make a sunset of sorts. A punched circle from a sticky note makes a nice mask for the sun.

After that, I stamped the sentiment and image from Serene Silhouettes in Basic Black ink. I left the inside blank, so this could be So Sorry times are tough right now, or So Sorry for the loss of your beloved pet, So Sorry you've been ill, or even So Sorry this is late. There are many options available.

Heidi's card here inspired mine.

Stamps: So Sorry (Item 126525 wood, $21.95 or Item 126527 clear, $16.95), Serene Silhouettes;
Ink: Daffodil Delight, Pumpkin Pie, Basic Black;
Paper: Whisper White, Glossy White, Pumpkin Pie, Early Espresso;
Accessories: Scallop trim border punch, 1-1/4" circle punch, rubber brayer

This quilted Top Note card is For The Birds


I love the little birds in the For The Birds stamp set. I used markers to color this image before punching it out with the 1-3/4" circle punch.


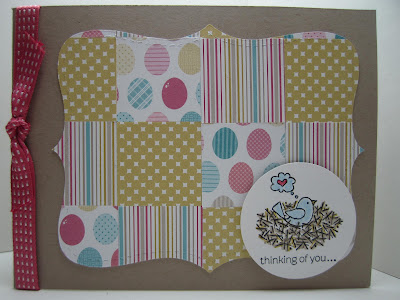
My club members made this card last month. It uses a quilting technique. We punched squares from Birds of a Feather dsp, adhered them to a quarter sheet of bond paper and then ran it through the Top Note die and Big Shot. It looks like a pretty, quilted blanket! And the stitched Raspberry Ripple ribbon is so soft.

Tuesday, July 17, 2012

French Foliage Man Card with masked framelit frame

SPECIAL: I'm leaving for Salt Lake City today for Stampin' Up!'s annual convention, and will be hosting a special thru Sunday evening: Place an Online Order through my website (http://TheRubberRoom.stampinup.net) and you'll be eligible for a giveaway featuring approximately $25 in convention product(s) from the Memento Mall!


Now to the card of the day: This close-up photo shows the sponged "faux" frame around the stamped label framelit piece of Very Vanilla, with a sentiment from Thoughts & Prayers. You take the smaller framelit and diecut a "mask" from copy paper, then hold it over the larger card stock framelit to sponge.


Then you need the negative diecut of the smaller framelit so you can hold it in place while you stamp inside. I hope that makes sense to you!

I know we're smack dab in the middle of summer, but the colors and French Foliage stamp set say Man Card to me. And I need a Man Card for my business advisor, Carlos. I'll be seeing him Wednesday at convention and can't be empty-handed! I CASE'd a card in the July issue of our demonstrator magazine, Stampin' Success. Krista Fenton won the "demo it" category with her card.

Don't forget - my Convention Product Giveaway will end Sunday evening, so place your online order anytime between now and Sunday at 5 p.m. Thanks!

And happy stampin'!!!

Monday, June 25, 2012

From My Heart swing card with Apothecary Accents Framelits


This Pumpkin Pie card uses the From The Heart stamp set with the Apothecary Accents Framelits to make a swing card. You're looking at the front of it. The card itself measures 4-1/4" x 7-1/4" with score lines at 2-3/4" and 3-3/4".


On the back side is this cute blimp from the Moving Forward stamp set. I'm hosting a class with this stamp set on July 3 at 11 a.m., though I need to know by the end of today if you want to attend. Click on the Classes tab above for details. Two bucks from the sale of this set go to Ronald McDonald House Charities.

So the trick to this swing card? Line up the end of the Apothecary Accent Framelit on the end of the 2-3/4" scored side of the pumpkin piece. Set the top cutting pad so the edge is at the 2-3/4" score line and run through the big shot. Then without picking up the framelit, turn the pumpkin piece 180 degrees and line up the end of the cutting pad on the 3-3/4" score line and run through again. The framelit will only cut through the card stock with the cutting pad on top. Stamp your images and use the same framelit to cut them out, then adhere them to each side of the swinging pumpkin piece.

This card was the third of three technique cards made for a class last Thursday.


Friday, June 22, 2012

Happy You card using Bargello Technique & Summer Smooches


I used the Bargello Technique on this card, which was for my technique class last night. It was the first time I'd even heard of the technique; but, I'm game to try anything... once! The boot stamp is from the Happy You hostess set. Bargello Technique involves using 3-4 patterns of designer paper, cut into 6" strips and adhered to bond paper (regular paper using when you print from your computer). With those strips laying horizontally, you then cut varying widths of strips, lay those in a pattern (pyramid, wave, ric rac, etc. Mine is a simple zigzag.) and adhere them down to a piece of card stock. After I had my design, I die cut it with a 3-1/2" circle die and built my card.


You can see the 2-1/2" x 4" piece of Whisper White card stock that I ran through the Chevron Embossing Folder. I used a 1-3/4" circle punch for the image, which was colored in with markers that coordinate with the Summer Smooches dsp.

There's a tutorial for the Bargello Technique at http://splitcoaststampers.com under Resources.

Happy stamping my friends!

Stamps: Happy You (hostess set);
Ink: Jet Black StazOn, markers - Real Red, Tempting Turquoise, Daffodil Delight, Rich Razzleberry;
Paper: Whisper White and Tempting Turquoise card stocks, Summer Smooches designer series paper;
Accessories: Chevron embossing folder, 1-3/4" Circle Punch, 1/8" Real Red taffeta, 3-1/2" Circle Die, Big Shot, Stampin' Dimensionals.

Thursday, June 21, 2012

Baby wipe technique with Papillon Potpourri for Freshly Made Sketches #40


I thought I'd join my friend Lesley this week for a challenge at Freshly Made Sketches. I'm doing a technique class tonight and the Baby Wipe Technique featured on this card is one of the projects. I used a few drops each of Daffodil Delight, Rich Razzleberry and Tangerine Tango reinkers on a folded wipe and used that to stamp butterflies from Papillon Potpourri. One butterfly was punched out using the Elegant Butterfly punch, and the other two were hand cut. Then I added 2-way glue and Dazzling Diamonds glitter to really make them sparkle and shine.


The patterned paper is from the Floral District pack, and my "oval" is a label framelit stamped with a flourish from Everything Eleanor in Baja Breeze, and a few pearls. The stitched Daffodil Delight ribbon looks crooked in the photo, but the card is bowed. The sentiment is from the Sweet Essentials stamp set.


You have until noon Monday (PST) to enter the challenge here. Have fun!


*Only a few more Followers and I'll be giving away Blog Candy! Please Follow me today!!! Thanks.

Sunday, March 11, 2012

Packed for Birthday pinata card


I brought out the Brights for this Packed for Birthday card. It uses a single stamp. I stamped the image twice, using a 1/4" circle punch to highlight the pinata, then layering it on Tangerine Tango. This technique is called Spotlighting with a Punch. This was a design for a recent 10-card class.
Stamps: Packed for Birthday;
Ink: Basic Gray, Markers - Tangerine Tango, Tempting Turquoise, Real Red;
Paper: Whisper White, Real Red, Tangerine Tango, Brights Pattern Pad;
Accessories: 1-1/4" and 1-3/8" circle punches, dimensionals, 1/4" Real Red grosgrain.

Tuesday, February 14, 2012

Happy Valentine's Day to you and yours!


Happy Valentine's Day! This heart easel card (CASE'd from Diana Gibbs) reminds me of a box of chocolates. I used the Hearts Framelits and Riding Hood Red pleated satin ribbon, as well as a handful of punches - Word Window, Modern Label, and Full Heart. This was one of the projects I had at my Valentines Class a couple of weeks ago. Sweet, eh? I wish you all an absolutely lovely day!

Tuesday, May 17, 2011

New technique, more downline shares at American Ink team meeting


Karen (Puddin') shared this beautiful card. It uses a technique called Floating Reinkers. To do the technique: Start with Shimmery White card stock. Stamp image in StazOn ink or heat emboss image. Wet card stock. Add reinker and let dry overnight. For these flowers, Karen used Daffodil Delight and Rich Razzleberry colors. This card uses Fabulous Florets and Swirls & Curls Verses stamp sets.


Barb brought this Sunny Day card to share. I love how she used the crimper on the Pacific Point card stock. It makes it wave-like, with sunshine overhead!


Michelle brought this Travel Log brag book page.


A set of brag book pages with You're a Gem

Happy demonstrators!

Tuesday, April 12, 2011

Faux Mother of Pearl Fun Flowers and New Postage Stamp Set & Punch


I've only taken photos of two swaps so far - Karen's above and mine below. Karen is in my downline. She used the Faux Mother of Pearl Technique on flowers from the Fun Flowers Die for her card. To do the technique, she started with Whisper White card stock and sponged on Shimmer Paint in Frost White. After that, she brayered on Classic Rose Red ink. The flowers look almost metallic!


My card is simple - the front was run through the Perfect Polka Dots embossing folder. I added a strip of Real Red patterned paper (from the Brights pad), with a Dotted Scallop Ribbon Border-punched piece of Old Olive behind it. The stamp is a new image from the Pretty Postage set in the upcoming Summer Mini Catalog. I used markers to ink the stamp, then punched it out with the Postage Stamp Punch, another Summer Mini item.

I'm hoping to have time today to take photos of the rest of our American Ink team swaps, so look for those later!

Friday, April 8, 2011

Timeless Treasures shoe for sketch challenge...


There's nothing like a vintage woman's shoe from Timeless Treasures and Lap of Luxury dsp to make a card for a special friend. I used Mary Jo's sketch at Technostamper (see sketch below) for the design of my card, using antique brads on the right side of the card and a couple of pearls on the shoe itself. I first stamped the shoe in Pretty in Pink and then rolled the edges in Concord Crush ink (rock 'n' roll technique). The Very Vanilla layer adhered to the card front with dimensionals was first put through the Vintage Wallpaper embossing folder.


Wednesday, March 30, 2011

Melon Mambo Strength & Hope...


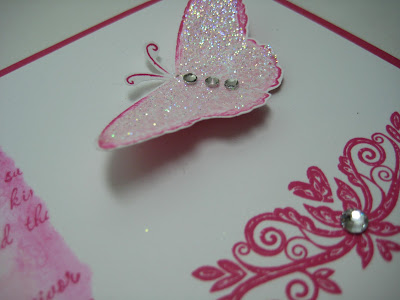
I was playing with faux tearing and rock 'n' roll techniques with the Strength & Hope card above. I stamped the butterfly in Pretty in Pink and rolled it in Melon Mambo. After looking at the photos, I think I could've added more Melon Mambo around the edges of the butterfly. I added 2-way glue and Dazzling Diamonds glitter and a few rhinestones for lots of added bling. You can see a close-up photo below.

For the Faux Tearing Technique, you simply tear a piece of paper and lay it down over the Whisper White (in this case). Sponge Melon Mambo up to it. Then when you move the paper you see a torn edge without adding another paper layer! I sponged all over the left side after stamping the words repeatedly.


Strength & Hope will be available to purchase Friday, April 1, throughout the month. Two dollars from every set sold will benefit Breast Cancer research. Email me if you'd like to get this set!

Tuesday, January 11, 2011

American Ink make & takes...

By Michelle
I shared our group swaps yesterday, so today I thought I'd share the make & takes. I always take volunteers for these, so it was great that so many brought ideas for everyone to make. My make & take was the Be My Valentine gatefold card posted earlier.

By Barb - Faux Silk Technique

By Kimberly
By Mary Ann

Saturday, June 19, 2010

Voila easel card...

My club members enjoyed making this easel card using the Voila stamp set, which is retiring at the end of the month.

We did paper piecing with Pawsitively Prints designer paper - stamping the chef on the paper, as well as the Very Vanilla square.

We used markers, along with an aqua painter and Not Quite Navy pad, to color in the images.

It's a fun card to make!


Monday, May 24, 2010

Elements of Style and Spotlighting with a Punch...

Like many demonstrators, I'm working my way through colors that are soon to retire.

The card base is Handsome Hunter, with the big floral spray from Elements of Style stamped in the same color ink. We stamped the spray a second time on scrap paper in Basic Brown ink and punched it out with the 1-1/4" circle punch.

There's a 1-3/8" circle of Handsome Hunter layered behind the colored flowers, which were watercolored (the reason we used Basic Brown) using Rose Red and Handsome Hunter ink pads.

A knot of Chocolate Chip satin ribbon finishes the card. Everyone chose a different sentiment.