To order any of the items used, please visit my Online Store at http://TheRubberRoom.stampinup.net. Thanks!
Tuesday, June 25, 2013
Creating a coffee cup card with Label Love
To order any of the items used, please visit my Online Store at http://TheRubberRoom.stampinup.net. Thanks!
Sunday, February 26, 2012
Beautiful Butterfly die with First Edition dsp
Friday, October 21, 2011
Jolly Bingo Bits for Monkey Challenge 79: Holiday Cheer
Sunday, August 14, 2011
Team make & takes and letting the cat out of the bag
Monday, July 11, 2011
Flower-topped Blossom Box
I couldn't wait to try out the new Blossom Box die for the Big Shot. The instructions are clear (I was able to assemble the box correctly the first time through!) and it's a really cute favor. I used Cheerful Treat dsp (a hostess freebie with a qualifying $150 order) and tied on a tag (using a Tiny Tags stamp with the Medium Jewelry Punch) with White Baker's Twine.
To make the flower: Punch 8 Fancy Flowers, spritz with water and crumple up tightly. Unfold the flowers and pile them on top of each other. Poke a hole in the middle and insert a silver brad (it's a tight fit, but you'll be able to open the legs a little bit). Starting with the top flower, squish it all toward the middle as tightly as possible. Repeat with the other seven flowers. Then spread out the layers as much as you like!
Friday, April 15, 2011
Ah... This Monkey Challenge 52 is A Slice of Life...
I was thinking coffee shop, a newspaper with your coffee... that's what got me started. I sponged Newsprint dsp (top) and Elegant Soiree dsp (bottom) with a luxurious knot of 5/8" Very Vanilla satin ribbon separating the two. I used an image from A Slice of Life. It's a Level 1 hostess set in the Occasions Mini Catalog, which is only available till the end of April. To the left of the cups, I used the Tiny Tags stamp set with the Medium Jewelry Punch and Vintage Trinkets (those adorable looking button brads!) to add a "love 4 you" greeting. I enjoy an occasional mocha with a little coconut and whipped cream. The drink is called "The Hollywood Star" at the bowling alley espresso stand. I call it pure bliss!
I hope you'll create a card for this challenge. Why? 'Cause it's fun, silly!!! If you're not sure where to start, you'll want to visit http://alacardmonkey.blogspot.com/ to see all the wonderful ideas. You'll have to visit the monkey blog anyway to upload your card. Love ya!
Thursday, January 13, 2011
A key to my heart fits color challenge...
Thursday, November 18, 2010
Snowmen sound delicious
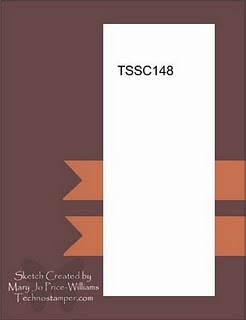
For my card, I stacked the cute little snowman from Jolly Bingo Bits and colored each of their little scarves a different color. I'm diggin' those little stamps. I'll be showing you a stamp-a-stack card we made in a couple of days. The designer paper is from the Nursery Suite pack. I followed the sketch from http://technostamper.blogspot.com/, and added a Tiny Tag. I kinda pulled the taffeta too tight and made an indentation in the card stock (oops). That sucker's not moving! I hope you enjoy your Friday.
Monday, March 29, 2010
Thoroughly Modern Pendant Note Card...
 If you want a quick note with lots of class, I suggest buying Stampin' Up!'s Pendant Note Cards. They come in a pack of 15 Kraft notecards already laser diecut with Kraft envelopes.
First I stamped the En Francais background in Basic Brown and sponged around the front of the card. Then I added a 4" square piece of Thoroughly Modern designer paper inside the front of the card and punched a hole for the Real Red epoxy brad.
To finish the card I knotted some Real Red Polka-Dotted ribbon and added a little tag using the Tiny Tags stamp set and the Medium Jewelry Tag punch. It's attached with linen thread.
Sunday, February 21, 2010
Tiny Tags & I (Heart) Hearts card...
 I love the collage look of this card.
The body is Kraft card stock that's been stamped all over with the Vintage Vogue stamp set, some of the images stamped off.
The Real Red layer features the Faux Suede technique (basically curl the card stock with your bone folder as you would scissors with curling ribbon. The card stock will separate into two layers, with the insides feeling like suede.)
For the flower, I used two strips of 1" Real Red card stock, each punched with the Eyelet Border Punch, then sponged with Chocolate Chip ink and run through the paper crimper a few times (you can run both strips through the crimper at the same time)., then I tore it a bit to make it look distressed.
I put down some SNAIL adhesive on the Real Red layer where I wanted the flower, and started from the outside, winding the paper in a circle. The crimping helps break down the paper fibers so they give easier. A jumbo Chocolate Chip brad was adhered to the center with dimensionals.
The heart is from I (Heart) Hearts. I stamped it in Chocolate Chip ink on Kraft paper and hand cut it out, sponging the edges before adding a red rhinestone brad. It's adhered onto the card front with dimensionals.
I used Kraft taffeta ribbon for the knot, and used the Tiny Tags stamp set with the Medium Jewelry Tag punch for the tag, adding it to the ribbon with linen thread.
Kimberly at Stampin' By The Sea inspired this card with a box of hers.


