Saturday, February 5, 2011
Polka-dotted Eat Chocolate stamp-a-stack card...
I started this Soft Suede card by running the bottom half of the front through the Big Shot in the Perfect Polka Dots embossing folder. This was the final stamp-a-stack card made at my most recent event. It uses a 1-1/2" x 5-1/2" strip of Elegant Soiree dsp, a 2-1/2" Pretty in Pink circle, and the Eat Chocolate image punched using the Decorative Label Punch. We added Dazzling Diamond glitter with a 2-way glue pen on the top of the chocolates, and two brads from the Soft Subtles pack.
Plane & Simple birthday card with sponged clouds...
I made a card similar to this Plane & Simple one awhile back, but thought this would make a good stamp-a-stack card since we could all use cards for the men/boys in our lives. It uses Blueberry Crisp dsp, torn and layered on a piece of torn Pacific Point card stock. The plane was stamped in Pacific Point ink, and clouds were sponged on the card front and plane layer using a sponge dauber, Bashful Blue ink and a punch scallop circle. The top layer was distressed with a Cutter Kit. I had the Teeny, Tiny Wishes stamp set so everybody could select the sentiment of their choice. Most all fit in the Word Window punch, then we adhered them with dimensionals.
Thanks for Caring in Concord Crush...
Along with the Sew Suite card in the post below (for Mary Ann's birthday), we made this card at my stamp-a-stack a few days ago. It uses the Thanks for Caring stamp set, Concord Crush ink and dsp (In Color pad), and a sentiment from So Happy For You (a Sale-a-Bration set you may earn for FREE with a $50 order). We punched a 1" x 3" strip of Concord Crush with the Eyelet Border Punch, and added a knot of 5/8" Whisper White Satin Ribbon.
Friday, February 4, 2011
Happy Sew Suite Birthday Mary Ann!
I want to wish my newest downline and club member Mary Ann a very Happy Birthday today! I'm sending her this Sew Suite card featuring some Sweet Stitches dsp. This was one of the cards my friends made yesterday at my stamp-a-stack. It uses the Level 2 hostess set Something to Celebrate (in the Occasions Mini) and Chocolate Chip ink. The button and the strip of card stock punched with the Scallop Trim Border are both Tempting Turquoise. I have no problem making cards... just sending them out! Have a fabulous day.
Thursday, February 3, 2011
Cute card features A Slice of Life...
I used my own sketch to ink up A Slice of Life stamp set - it's a freebie hostess set with any $150 order. I started with some Lap of Luxury dsp layered on Concord Crush card stock, and then on a Whisper White card base. The flower and vase image were stamped in Concord Crush ink, then I used a blender pen and Pink Pirouette ink pad to color the flowers. I adore the tiny pearls on each flower. You can see a closer look below:
To finish the card, I added a Love Impressions Rub-On (the XOXO) and a pearl and adhered it with dimensionals. Have a great weekend!
Tuesday, February 1, 2011
New button jars, matching fabric and designer paper for WOYWW...
I was on a mission to find curved jelly jars to hold my big designer buttons from Stampin' Up!. My family went out and about to a couple of stores last weekend and finally found the jars at Fred Meyer. Only $5 for four of them! They were a bargain. And they're already full. I traced the lid onto some Springtime Vintage fabric, cut it out and adhered it to the lid of the jar. Then I added a knot of 5/8" Marina Mist satin ribbon. You can see the other patterns in the fabric pack to the left of the jar.
Why am I showing you my button jar and my desk? Well, it's for Julia's What's on Your Workdesk Wednesday (WOYWW). You can poke your head into rooms all over the world. It's great fun!
Now back to my desk. You can see the card I made with some of the Springtime Vintage dsp. I followed a sketch (the card and sketch are shown in the post below). The stamp set I used for the card is shown on the left side of the photo. It's a hostess set I earned for free called Fast & Fabulous. Also on my desk - some Love Impressions Rub-Ons I've been using to make valentines, and some older watercolor crayons. Now go check out some other work places of creative people at http://stamping-ground.blogspot.com/ and have a fabulous Wednesday!
Fast & Fabulous Sweet Sunday sketch challenge...
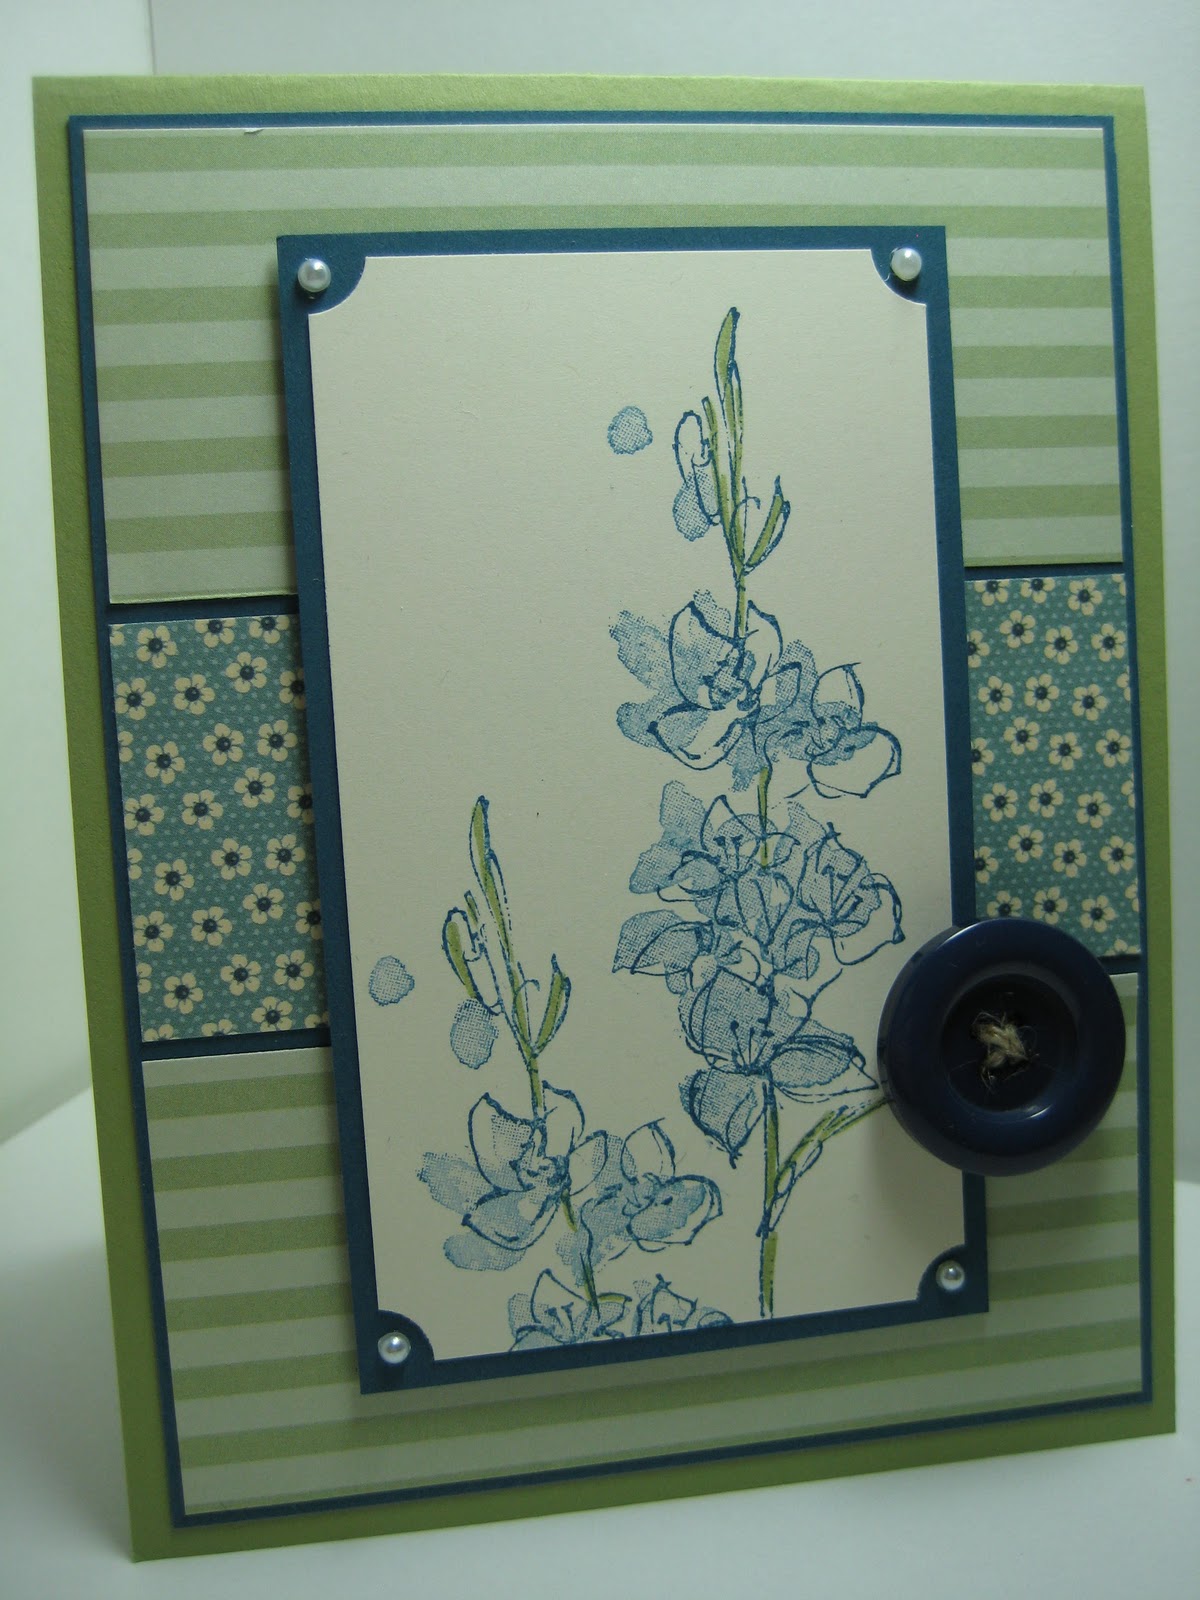
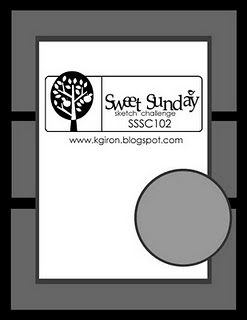
I love this three-panel sketch provided by Karen over at Sweet Sunday Sketch Challenge. I started with a Pear Pizzazz card body, added a layer of Not Quite Navy card stock, with panels from the Springtime Vintage dsp pack. The stamps are from the Level 2 hostess set, Fast & Fabulous. It's a 2-step stamp set that makes stamping fun and fast. I used the Ticket Corner Punch for the corners and added pearls. For the circle element, I picked a designer button. I'm diggin' these!
Punch Bunch thank-you cards...
I enjoy making quick and easy thank-you cards. There are so many things to be grateful for in life. These are for my club members. The cards use textured River Rock card stock (I cut a couple of 12" x 12" pieces down to 3" x 6" ones), along with scraps from my last stamp-a-stack class. I earned the Sale-a-Bration stamp set Punch Bunch for free and am putting it to work, along with the "thanks" from another SAB set, Happy for You.
Love Impressions Rub-Ons for Stamping 411 sketch...
I've been in valentine-making mode lately. I found a sheet of Love Impressions Rub-Ons and set about creating a card for the Stamping 411 sketch challenge this week. I used scraps from my Valentines class last week to create the card above. I added the three heart rub-ons before running the Whisper White layer through the Perfect Polka Dots embossing folder. The "Love You" is also a rub-on that I rubbed on Whisper White, punched out and adhered with dimensionals. The only stamp on the card is the XOXO background in Pretty in Pink ink. I plan on doing two more sketch challenges today, so come back later this afternoon to see those! Have a great day.
Love Impressions Rub-Ons are Something to Celebrate...
This Sweet Valentine pink pirouette card features rub-ons and the Level 2 hostess set, Something to Celebrate. Stampin' Up! sent all of its demonstrators some rub-ons to try when the Occasions Mini Catalog started last month. You may purchase these Love Impressions Rub-Ons for only $7.95 on page 8 of the mini. The rub-on layer is adhered with dimensionals, then I added a strip of Real Red with 1/8" Pretty in Pink taffeta and a Real Red designer button.
Saturday, January 29, 2011
Good "Love Impressions" for Valentine's Day...
This card is all Blushing Bride and Basic Gray - right off of the Love Impressions specialty designer paper. I ran Whisper White card stock through the Two Tags die for the Big Shot, sponged around it witih Blushing Bride, added a big designer button with dimensionals, and a knot of that fabulous Blushing Bride 1/2" stitched-poly ribbon. The three hearts are from a single stamp from the I "Heart" Hearts set (page 46 of the big catalog), punched out with the 3-heart punch and adhered with dimensionals. This card was CASE'd from Andrea Walford with changes. Oh, and the "love you" is from the Short & Sweet set in the big catalog, stamped in Basic Gray ink.
Blowing Kisses your way for valentine's day...
Blowing Kisses is such a sweet stamp set. This card is all Crumb Cake and Pretty in Pink. The 2" x 5-1/2" strip is from the Love Patterns dsp pack. It's layered on a strip of sponged Crumb Cake that was punched with the Scallop Trim Border Punch. I tied a knot of Crumb Cake seam binding (new in the Occasions Mini), then added a piece of linen thread to hold on a neutral button. The image was colored with an aqua painter and ink pads. I CASE'd this card from Ilina Crouse.
A valentine with XOXO Hugs & Kisses and sparkle...
I love the colors in this valentine. I started with a Crumb Cake card, a layer of Basic Black (punched with the Scallop Border at the bottom), a strip of Love Letters dsp, and a Very Vanilla scallop envelope (die for the Big Shot). I got this idea from Andrea Walford. The big Riding Hood Red heart in the envelope was die cut with the Hearts & Brackets die, while I used the Full Heart Punch and glimmer paper for the smaller one. I used the Crop-a-dile to make the hole for the square fire rhinestone brad. The sentiment is from the XOXO stamp set in the Occasions Mini. It was stamped in black, then I added a small bow of 1/8" Basic Black taffeta with a mini glue dot.
Friday, January 28, 2011
A candy purse for the sweetest day ever...
My Valentines class last night was so much fun! There were 16 women making four cards and this purse (I had M&Ms for inside). I bought a purse - with candy in it - from Target, took it apart and used it for a pattern for my class. I used Pink Pirouette textured paper for the purse and Melon Mambo ink. The small heart came from the Hearts & Brackets die for the Big Shot. The big heart was punched from the Filled with Love stamp set and embellished with a vanilla rosette from the Occasions Mini. The sentiment is from the Something Sweet stamp set, punched with the Modern Label and embellished with rhinestones. I used 1/4" Pretty in Pink grosgrain for the handle. I need to go pick up my girl from school! I'll post the cards later. Thanks for looking!
Thursday, January 27, 2011
Kimono Kids for color challenge...
The colors of River Rock, Peach Parfait and Pink Pirouette presented a serious challenge for me. I sat at my desk and pondered how to put them together. I hadn't used Kimono Kids before, so I thought I could bring all the colors together in the girls' dresses. I bought the stamp set primarily for the phrase you see on this card. I stamped everything in Early Espresso ink and used markers in the challenge to add color. The girl on the right has pearls for the middle of her flowers.
Sunday, January 23, 2011
Sharing My Digital Studio scrapbooking pages...
I used a designer template from My Digital Studio and added my photos. I deleted items here and there so I had room to add what I needed to. Only the middle page is exactly the way the template originally had it. I just added four photos. For the bottom page, I wanted just one photo with my "Made with love by Terry." It's at the end of the book. I can't wait to send this off to the printer! I hope you have a wonderful week ahead.
Thursday, January 20, 2011
It's birds, birds, and more birds...
I admit I took the easy way to make a bird card for a theme challenge this week - by using a design already on a sheet of Botanicals Gazette dsp. I added some watercolor crayon with an aquapainter on the bird, then a few neutral buttons and some natural hemp. That's it! And one more reason I love Stampin' Up! products - you don't need to take an hour to make a nice card.
Cupcake and bird birthday cards...
I had my Birthday Card Stamp-a-Stack last night and 14 women showed. It was fun! You make two of each card, and there are five different designs. The first card above uses the Nature Walk stamp set, Botanicals Gazette dsp, Not Quite Navy ink and a sentiment from Upsy Daisy.
This card uses Peach Parfait and Pear Pizzazz (punched with the Dotted Scallop Ribbon Border Punch), along with the Take a Spin stamp set and game spinner hands, which are very easy to use.
This card uses First Edition dsp, which feels thin like newspaper, and the birds from Clearly For You. The birds were stamped in Bashful Blue, then we used a Marina Mist marker to make the middle bird darker. The sentiment is from the On Your Birthday stamp set.
This card uses the Birthday Bakery Level 1 hostess set with Pawsitively Prints II dsp and Crumb Cake card stock. The colors are Poppy Parade, Pear Pizzazz and Tempting Turquoise. The stamped image was punched out with the 1-3/4" circle punch and layered on the 2-3/8" scallop circle.
I do have a fifth card, but the photo didn't turn out well. I'll try to get a better photo later today, but I've gotta run for now! Have a great day.
Wednesday, January 19, 2011
Antique tags with Artistic Etchings and crochet trim...
My sister asked me to make some tags for her antique items she is selling next month. She asked for a little "French" - hence the Eiffel Tower from the Artistic Etchings set - and a bit antique looking. These tags are very soft. She can write the item and price directly over the stamping. She's just going to use regular string to attach the tags to her items. My friend and neighbor Beth helped me assemble these. Beth had some retired designer paper I ripped and sponged, and she colored the pearls. The smaller tags were leftover card stock from cutting the bigger ones!
Come back tomorrow. I'm hosting a Birthday Card Stamp-a-Stack tonight, so I'll put those cards on the blog Thursday. Have a great evening!
Monday, January 17, 2011
Petal Cone with Sweet Stitches fabric brads...
I learned a couple of things when I used the Petal Cone die for the Big Shot - 1) you need to run two pieces of card stock through the die, one at a time, so you get the nice score lines with the crease pad on top instead of a cutting pad; and 2) creating a petal cone project for a class is a lot of work!
I cut the Sweet Stitches designer paper down to smaller rectangles so I could get the most possible out of each 12" x 12" sheet. It takes four scalloped pieces for each cone if you put it together like I did before.
What's really cool? The fact that the new Sweet Stitches fabric designer brads match the dsp! I took a closer photo to show that below. The white strip is also on the die. I sponged around it with Melon Mambo (same color as the petal cone) and stamped a phrase from Teeny, Tiny Wishes on it. The last step was adding the 5/8" Whisper White satin ribbon for a handle. Hope you like it!
Subscribe to:
Posts (Atom)